Wednesday, February 29, 2012

Basement improvements continue.......


 Hi All,

Wasn't able to do much yesterday.  Tuesdays are always busy for my family, but today I managed to do some organizing and I built that skinny tall shelf over on the left of the first picture.  

I was very proud of my self for doing that.  
Pulled Rosie the Riveter out :).

Looking forward to Friday so my Master Carpenter (a.k.a my  husband) can anchor the shelving to the wall and I can start putting my supplies up, and put out my new table.  Hopefully, I can talk him into putting the dresser, I need put together, for under the window.

And get those lights up that are sitting on that table in the middle of the picture.  

And cut and put up the panels that are to cover the insulation.

And.... And..... We'll see.


I hope you all have a good night!

Mamita's Next Thing:

I am going to put up those darn curtains.  I think it will be something easy to do.  I hope.  

Lola


Monday, February 27, 2012

Basment update


Well, it's been an interesting couple of days that includes:
Yesterday: My 2 year old little girl breaking a maraca, and did you know that some of those little suckers have lead beads in them?  
Yeah, we didn't either.  
So, because my little girl is so fond of putting things in her mouth and we didn't know if she had, we called poison control and they had us call her doctor the next day. 

Today:  One vistit to the doctor, two x-rays and a phone call later, the doctor told us she was clear.
THANK YOU GOD!
She didn't swollow any of those lead beads.
 Phew! 

On a lighter note, I finally put up all the fabric.  Don't know how much we'll get done until Friday.  
My husband is taking Friday off.
HORRAY!


Well hope you all have a great night!

Oh, yeah,  I finally was able to move things around so I could do laundry.  That happened this weekend.

And there are NO cupcakes left. 
Sorry sis!

Mamita's Next Thing:

Finishing the basement so I can create.  Although I may have to move to the kitchen or just work with what space I do have I think my kids need something fun to do.  

Lola


Sunday, February 26, 2012

Mini Strawberry Cupcakes with Buttercream Icing and White Chocolate Hearts

Mini Strawberry Cupcakes with Buttercream Icing and White Chocolate Hearts

 Strawberry Cupcakes

Before you start, prepare what ever baking pan you will be using.  Line your cupcake pan with pretty decorative liners.
I just thought these looked so pretty.

Preheat oven to 350 degrees F (175 degrees C) 
Makes about 72 mini cupcakes 


INGREDIENTS:
2 3/4 cups all purpose flour 
4 teaspoons baking powder
3/4 teaspoons salt
4 egg whites
1 1/2 cups white sugar
3/4 cup butter
2 cups pureed thawed frozen strawberries 
   *you can use a blender to pure the strawberries after they thaw, then pour the pure through a colander made of mesh material for extra small holes to remove as many of the seeds as possible.   or you can just leave the seed in.  


 DIRECTIONS:
1. Sift together flour, baking powder, and salt.  

2. In a mixing bowl, beat egg whites until foamy.  Add 1/2 cup sugar gradually, and continue beating until meringue holds soft peaks.
Foamy egg whites

Soft peeks
3.  Cream butter, gradually adding the remaining 1 cup sugar.  Cream together until light and fluffy.  Add flour mixture alternately with the pureed strawberries.  Beat after each addition until smooth.

4.  Add meringue and beat thoroughly into the batter.  Scoop into your cupcake liners.  I use a tablespoon size scoop to place the batter into the liners.    

5.  Put your batter into a preheated oven at 350 degrees F (175 degrees C) for 8 to 10 min for cupcakes.  Let the cupcakes cool in the pan for no longer than 10 minutes.  Remove from pan and transfer to a wire rack to finish cooling. 


Buttercream Icing
INGREDIENTS:  
1 cup unsalted room temperature butter
3 cups powder sugar (sift if needed)
1 to 3 teaspoons water (you can add more if needed, but do so little at a time)


DIRECTIONS:
1. Beat the butter to make it soft ( about 30 seconds or so)

2. Add the powder sugar and mix, adding 2 teaspoons of water.  Mix until all is combined.  Adding more water if needed.  You want to have a smooth texture like whipped cream.  You don't want to add more than 4 teaspoons of water.  Mix until it becomes smooth. 

3. Decorate cupcakes with piping bag (or a sandwich bag) and large round Tip (or you can cut the corner of the sandwich bag (freezer bags work better) about 1/2".  


Piping with Chocolate
 YOU WILL NEED:
1 lb. bag of red Candy Melts
1 lb. bag of white Candy Melts
2 piping bags (sandwich [freezer] bags)
Tip #2
Tip #3
2 couplers (optional, but it dose stabilize the tip) 
Heart Template (you can make your own you use mine which I have provided at the end.)
Wax paper
Cookie sheet
tape


1. place your heart templates on your cookie sheet and affix with tape.  Place a piece of wax paper over the stencils so it over laps.    

2. You will need to cut the tip of the piping bag and fit the coupler.  Don't put the tip on just yet.  Add the Candy Melts to the bag (about half the bag and twist the end to close the bag off) and place in the microwave with a microwavable bowl and the coupler toward the top.  Heat for 30 seconds and massage the bag to help the melting process.  Place the bag back into the microwave and heat for 15 seconds only.  Massage again.  Heat for another 15 seconds and message again.  The Candy Melts should be smooth.  You want the Candy to be smooth so your piping will be smooth.  If you let the microwave go for the whole minute you could burn the Candy Melts.

3.  Place your tip #3 on.  and squeezing the bag gently.  Start tracing the heart first.


 4. When you are finished tracing, you can fill in the heart.


5. Now Melt the white Candy Melts the same way as the red ones.  With tip #2 I moved my hand in a scribbling motion over the hearts on the left.  and I dotted the ones on the right. 


And here they are.  My husband cant stop eating them.  There won't be any left by tomorrow night.


I hope you enjoy!
If you have any questions let me know
 Here is my heart template for me to share with you.
Please, for personal use only.
Thank You!   

Mamita's Next Thing:

Back to the grind!  The Basement improvements! YAY!  This weekend was stressful due to my hubby having to work.  So getting back to routine will be good.  I have to put in my bible study homework, but I am going to finish putting up the fabric, and try to build the small shelf on my own.  Can't wait it's almost over and I have projects dancing in my head.  Hope you all have a good night.  I know I will sleep good tonight. 

Lola

Saturday, February 25, 2012

Basement improvemnts continue Day 3..........

 Quick post today.  My hubby had to work today so I couldn't get as much done as I wanted.  

But he did get the shelving (that was in 4 boxes) up for me.  It looks great.  I was hope this would be done by tomorrow, but it is going to be another work day for my hubby.  


As promised, I will be sharing cupcake and piping with chocolate.  

Goodnight!


Mamita's Next Thing:

Strawberry cupcakes, with butter-cream icing and white chocolate hearts.  I will be posting pictures up so you can see how I do it.  

Lola  

Friday, February 24, 2012

Basment Improvments Continue


 So, there's this corner where my hubby built a closet that I had to manipulate and cut the fabric so it would fit.  And so I cut it out and, I was thinking about binding it but instead I just folded it over and sewed it. 


 Not my best sewing but no one is going to see it unless they know it's there and want to see it.  Any way.
I sewed all four panels together yesterday and got some thumbtacks on clearance, and I thought the colors were pretty.   I also hemmed the fabric today.  I used the thumbtacks to attach the fabric to the top.  I didn't take the time to hem the top because boards will be going up and they will only be lying there to cover the installation.  So far the fabric is staying up.  I also attached the Velcro to the fabric.    
 And this is what it looks like.  It reminds me of a retro wall paper.  It's a good thing purple is my favorite color, any shade or tint. 


Well that's all for today.  I hope you all have a good night and until next time. 
 

Mamita's Next Thing:
My hubby promised to put the shelving unit up tonight.  So Tomorrow I will be putting up the rest of the fabric on the other wall, and doing some organizing.  But I think I may go ahead and treat you to something new.  I'm thinking Cupcakes and piping with chocolate for Sunday.

Lola 

Thursday, February 23, 2012

Basment improvement.......


 So I didn't get as far as I wanted to yesterday....  oh well.  I always have high expectations and I forget how long things actually take, hence, going crazy when I do projects.

But I really need to get all this stuff organized.  You probably can't see them, but my washer and dryer are back there some where and my family is seriously running out of clean clothes.  My wonderful hubby also decided to bring down all the laundry (bless his cotton picken heart) the day before we were going to start on the improvements.  So our dirty laundry is back there somewhere too. 

  Well I guess that works to push me to finish. 


 Well yesterday was another whirl wind, but again when is it not when you have kids, right!  

What I did is place the Industrial Strength Velcro up and found out that I need more.  It took about 10, 4 feet long strips.   


 And I ironed and cut 4 strips of fabric, 79 inches long each. 


 And so this is where I left off.  Cut strips of fabric, Velcro on the wall, and partially ironed piece of fabric.


Mamita's Next Thing:

 The plan for today is to sew all the fabric together and put up my first panel of fabric.  This will allow me to put up the shelf that's in 4 boxes still in my front room.

I think I may need help with that one.  :)

I hope you all have a great day!  Can't wait 'till it all comes together and I can wash my clothes. 


Tuesday, February 21, 2012

Basement improvements......in the process. 

Because we have decided to stay put in our rental another 3 years.  I have decided that the basement needs improvement.  A nice place where I can create and a place where people can stay. 

So after a mad shopping trip to IKEA, we are on our way to improvement and organization.     


Basement Before I started to clear things out for the carpet.


Carpet laid down.  It was wall to wall which I didn't think it would be possible, but thanks to Walt and Kathi (my wonderful in-laws)  my dream was more than possible.  It looks FABULOUS!  Thank you Hubby for doing such a great job!   


And this is where I left off.  I took down the white boards, put up the table for my sewing machine, vacuumed, and took down the White fabric.  


It was a whirl wind of a day.  My hubby did a lot of building of shelves and drawers, in other parts of the house so I could organize.  My daughter needed a new dresser and to our disbelief, it took over 4 hrs to build.  Needless to say,  my daughter didn't go to sleep until way after her bed time.  When your two year old starts asking to go to sleep you know it's too late for her, but the dresser looks great and I've told her she can't have a new until after college.  My hubby also put together 3 shelving units for toys.  My family room looks somewhat organized at the moment.   So yes, a whirl wind of a day, and I am glad it is over.  


Have a great day!


Now off to the next thing. 


Mamita's Next Thing:

Putting up fabric on the cement walls.  Come back to see what I do.


Monday, February 20, 2012

Valentine's! 

This year for my son's valentine party I created bags for all of the kids at his school (25 + 3 teachers and my daughter).  Phew!  I got the Idea from last years Scrapbook etc. magazine.  The original was a small Valentine Robot card.  The body was made with a mini chocolate bar wrapped with a cute paper and a whole lot of tiny pieces.  This card I made last year.  I know CRAZY!  I made So this year I went big, and when I can't get an idea out of my head I have to go for it.  

I know Valentine's is over, but there's always next year.


 This idea can be changed to accommodate your celebration just change the bag color and some of the decorations on it and your good to go.  


 28 bags all in somewhat of a row
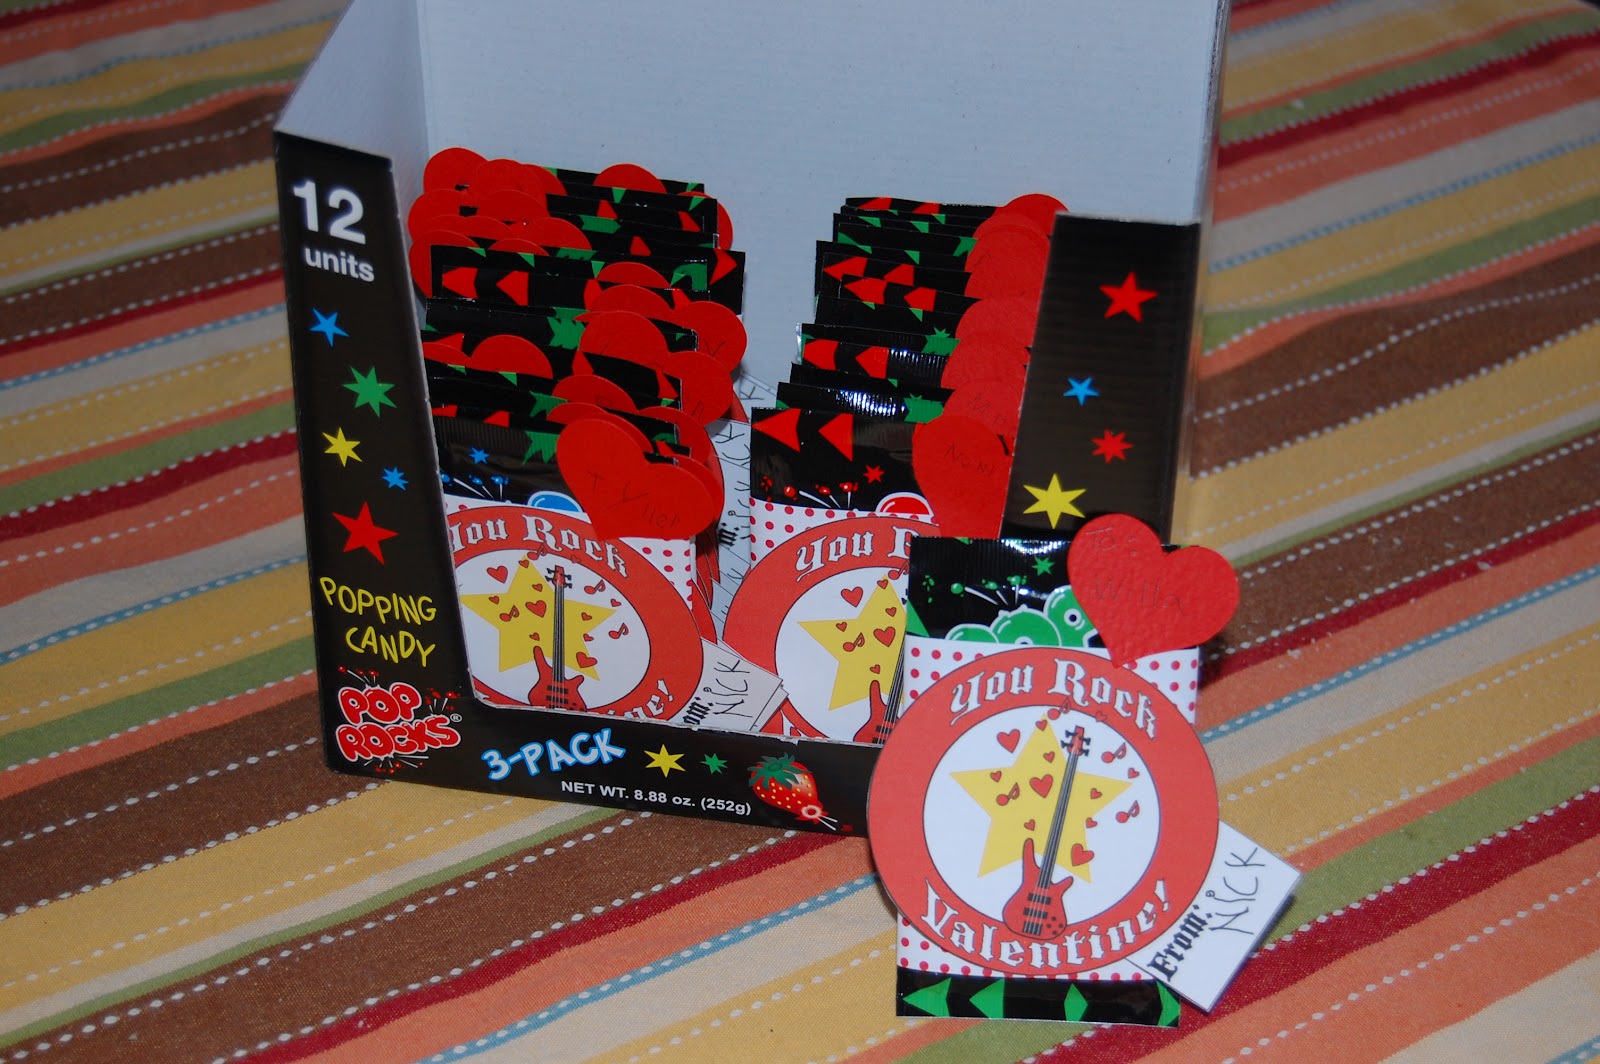


POP ROCKS!  

This explosive candy was a popular Valentine to give this year.  There were a lot of really good ideas out there but not crazy enough for me....... so I compiled and made these.  


What I did:
1. I wrapped the pop rocks pouch with a 3"X 6" piece of printed scrapbook paper.  I used a 12X12. 

2. I made the You Rock Tags, printed, cut and glued on top of the wrapped paper.  I had my son sign his name on the computer so then I could just copy and past as many as I needed.  This way his writing energy could be used to write all of his friends names on the harts.  


I am happy to share these printables with you, so long as:
*You ONLY use them for  PERSONAL USE.
*You DONOT re-sell, redistribute, or claim them as your own. 
* If you post this on the internet, credit must be given to Mamita's Nest Thing and linked back to my blog.  
Thank you!


Mamita's Next Thing:


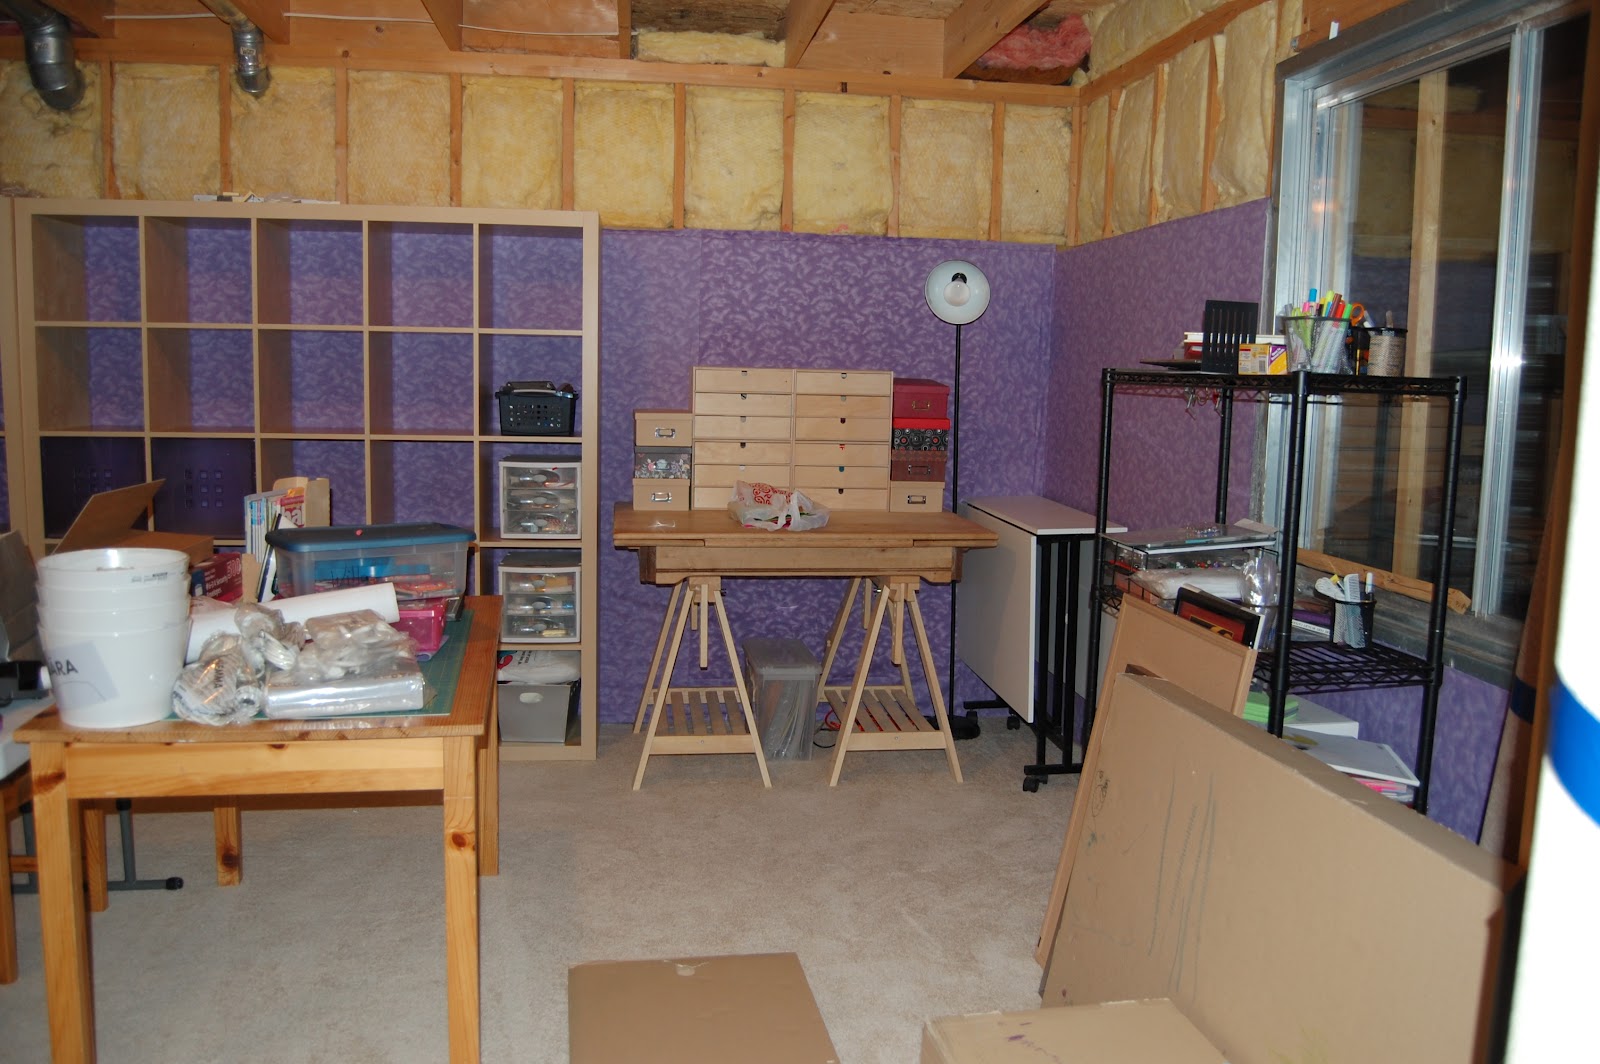
I am about to embark on a huge task of remodeling my basement.  The catch is, we are renting and can't do anything permanent.  Meaning we can't paint, build to cover any walls that require drilling into the concert wall, put in walls.  Yes this will be interesting but I have ideas....  MUAHAHA!   


So, come back and see what I do.  I will be posting updates as I progress in this endeavor.