Showing posts with label Cake decorating. Show all posts

Tuesday, May 15, 2012

Teacher Apprecitation Week

OK, so, yeah Teacher Appreciation is over.......

but I still want to share what I've been doing for the past two weeks......

Never in my life did I ever think I would be using something I learned to do while working in a restaurant as a hostess. 

And when one of the moms said,

"Wouldn't it be great if we could make a balloon arch for the front of the school!  Do we know any one who knows how to make one?" 

I raised my hand because when I was that lowly hostess I learned how to make balloon arches.  I guess we shouldn't take for granted what we learn in jobs we don't think we'll ever revisit. 

Any way, 
Another mom and I got up at 6:30 am, Tuesday to make the balloon arch before the teachers got there.  The plan was to do it on Monday but it was raining, and raining, and raining. 

So the rain kind of made it hard for us to get the balloon arch up. 

The teachers did get a special snack for Monday. 


 And did I mention that I was helping out in two schools?

For my sons kindergarten teacher I planned for her to get presents from the class everyday for the whole week (more on this a little later) .  They also had a "Staff Appreciation" lunch Monday.

I made Creamy Broccoli soup.     

I had appointed my self to give my sons teacher a basket with apples in it for Tuesday.  The plan was to have other children give her more apples.  Enough so it would look like the apples were picked from an apple tree. 

The sign says :  "A good teacher deserves an apple.  You deserve the whole tree!"

On that same day,  Harmony teachers got these fancy little cupcakes that I made (the flowers and pearls I made as well).

Flavor,  Orange Lavender cupcakes with buttercream icing.  (I'll share the recipe on a future post)


Along the way the Harmony teachers got other little gifts like stationary, and more food.

On Thursday we (the Harmony Teacher Appreciation Committee) put on a lunch for them.  The theme, if you haven't guessed yet, "Treasure".

When the teachers arrived, they had gifts waiting for them at the table.  The committee put together beach bags that had water bottles filled with Crystal Light and energy bars, cute sandals,  and one other thing that escapes my mind.  One of the moms is the owner of a bagel shop in town and they provided the food.  Our table settings where a chest with flowers and a fish bowl.

We made quite a team!
I made this treasure chest cake for them.  It's all edible (except for the piece of wood holding up the lid).  Even the sand.  It's brown sugar.  Coins are chocolate.  The gems are hard candy, and the sea shells and starfish are made out of fondant.  The plumaria flowers are gumpaste.  All edible!  Yes, the lid is edible too. 

Cake flavor:  Lemon cake with raspberry buttercream.


I had way too much cake left over, so I made cake balls.  And the left over gems I put in little bags and .......
I'll show you soon.


But more on the plan I made for my sons Kindergarten teacher.

Monday:  Her favorite coffee and a pastry. Didn't want to do to much there due to the Staff Appreciation lunch. 

Tuesday: Apples with the basket

Wednesday:  Balloons

Thursday:  Potted Plants and Stationary.

Friday:  No school.

I Also encouraged the parents to have there children write her letters of appreciation.

If I am a home room mom next year I will most likely do something similar. 


PHEW!!!!  Loved spoiling, but glad it's done.


Mamita's Next Thing:

For sure, I will share that Orange Lavender cupcake recipe with you and I still need to share what I did for Mothers Day.  I got something new in my "Studio" that I am so excited about.  So much to do, so little time.  

Have a great day!

Lola


Wednesday, April 25, 2012

Quilts

I gotta tell you, if I never married my husband I would not be the person I am today.  This amazing group of people, that I love calling my family has encouraged me in ways I would have not understood other wise.

It all started with quilting.  Yes, I did go to college and got a degree in Fashion design, but back then I was a one minded, tunnel vision type of person.  I believed back then (11 years ago) that if you go to school for one thing you need to stick with it and do it for the rest of your life.  I always thought I would work for the rest of my life.

Any way,  after getting married to my amazing husband, which was a whopping 4 months after we met (he purposed two weeks after we met),  my sweet mother-in-law introduced me to quilting.  And my love of crafting began.      


 This is my first quilt ever.
 A Log Cabin quilt.  

This went to a boss of mine, for his firstborn child.  I wanted to give him something unique and special.  He introduced me to dental assisting and taught me everything I needed to for the job.  He taught me form scratch so to speak.   


This was my second quilt.
I learned to miter corners.  It's not as hard as you would think.  You just need a good book to show you how. I used "Happy Endings" by Mimi Dietrich.  And I'm sure there are tutorials out there too.  This quilt went to my co-worker for her first baby.


Here is my third quilt.  
And this went to another one of my co-workers for her first born son.  
Yep, now that I could do this I was giving my quilts away to people I would probably never see again.       


 This was my fourth quilt.
You guessed it, I gave this quilt away too.  This has been my favorite quilt.  And the quilt that made me swear not to give my quilts away to anybody but family and good friends that I at least am in contact with.

It was hard to part with this beautiful quilt.  I almost didn't give it to whom I was going to give it to. 

This came out of Debbie Mumm's "Just for Fun" quilt book, which I can't find at the moment.  I know it's in one of those tubs that has all my to be finished (or started) project tubs. 


This is my fifth quilt.
I made this one for some friends (that I am still in contact with and see from time to time.  Although it's been too long now sense I've seen them other than via facebook.  


This one was my sixth quilt.  

This quilt went to my amazing father-in-law. 
YAY!!! It stayed in the family. 
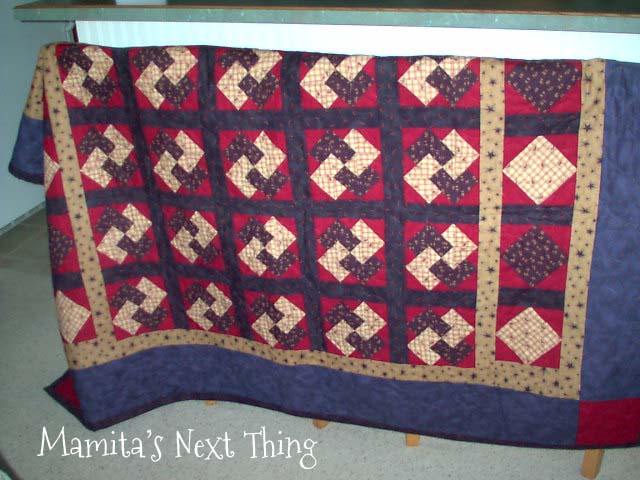
All the above quilts have been from patterns.  This one was my own doing. 
 Well, the blocks in the middle are called "Card Trick",  I made them from a book called "Around the Block" by Judy Hopkins.  But the arranging is my own doing, and the quilting.  I've always done my own quilting on my quilts.


 The Unfinished Stories
The following quilts are quilts I have not finished yet.  Most of them have been sitting in tubs waiting to be finished.
It's been a little over 5 years of those quilts just waiting to be loved on.  Each year I say this one but it never happens.  I've come a cross blogs who challenge other bloggers to use the stash of Crafts they already have and not go out and buy any.  That is a great idea, and if I didn't need to buy stuff for Teacher Appreciation week and my weekend Scrapbooking Retreat I would be all for it.  Maybe I can challenge my self in a couple of months.  I would love to see my quilts out and being used. 


These are a couple of quilts my husband has made.  
His motto:
 "A family who sews together, stays together."  


He did a great job.  The top one was his first. 
I'm so blessed to have him!  


After we were married a few years, he told me his dad had told him before we got married that......

"it is more expensive to pay a shrink then to let them buy crafts".  

I just love my father in law for planting that little seed in my husbands head.  Although, in my case a shrink might have been cheaper.  LOL!!!!!!!


Mamita's Next Thing:

Teacher Appreciation Week is coming up and I may not be back till after.  There's lot's to do for those amazing teachers that teach our children. 

Oh and I have a cupcake deadline for this Friday.  

I am going to try to document what I do along the way so I can share. 

See you Soon! (so to speak) 

Lola 

P.S.  If you're wondering if the basement "My Studio" is completely done yet...... Well it's not..... I've been keeping my husband busy doing other thing. 

I just can't think of what that is right now.

Have an great week!!!


Sunday, April 8, 2012

Easter Morning


On this morning I am thankful for 
the beauty that surrounds us.  
This was our view just outside our window.  Takes my breath away every time I see this tree.  


Today also marks my one year anniversary of my baptism.  One year of professing my belief in Christ and letting Him change my heart.   
There is still more changing and molding He needs to do in me. 
My life has been more 
beautiful with my LORD and Savor Jesus Christ in it.  

And life goes on.......
And my freedom in Christ continues. 

I finished my son's Easter basket!  Yay!

My children woke up to their Easter baskets with little buddies in them.  The baskets were waiting for them on the table just as you see here.  My son carried his for all half of the morning.  It was funny that they didn't notice them at first.  I had to point them in the right direction.

What of the rest of our Easter?


Needless to say, we had to postpone Easter Dinner.  

Why?

Well let me tell you...... We were sick, again.... yes, again.  

All last week it was passed on from my daughter , to my husband, to my son, to my husband, and just when I thought I was safe, it hit me, and all plans went out the door.  So it was decided to have Easter dinner next Sunday.   
My husband really wanted to enjoy his dinner.

We had a little egg hunt and spent time with family and called it a day around 5pm.  We stuck around the house, not wanting to spread this stomach thing we had.  
My Children had a blast with their Grandparents and their aunties.
(those brave souls) 

Ok, now I'm really tired of being sick.

Are we done?!!!!

I really want to be......
  
 I hope you all had a wonderful Easter.

Lola


Mamita's Next Thing:

Come back and see because I haven't decided yet.  Oh wait, I know, getting myself and my family feeling better.  

No really,  I haven't decided what to do yet.   There's a lot going on in this head of mine.....

Can any one give me some more time in the day?

.....because 8760 hours is not enough, oh yeah, plus 24 hours for leap year this year.


Wednesday, April 4, 2012

Easter Basket


 Hello!!!!!

I'm still here. (just barely) 

Seems like for ever sense I've been able to post something.

And guess what?.......  My family got sick again.  Luckily we are all back in good health.
I hope we are finished with the icky sicky season.  I don't think I can take another two weeks of it.  Yuk!

What!!!!?  Easter is this Saturday!!!!  No way,  it's too early, and I'm not ready.  Ugh!   I wanted do do so many things but am running out of time super fast.  Oh well.  We do what we can...... right?

So, a week ago I had this bright idea of making Easter Baskets for my children and I've got one done.

Here it is.  My daughter is ready for Easter and a good thing too........

She had an Easter egg hunt with her "Curious Twos" class today.

Here she is looking for Easter eggs and picking flowers.  She had a wonderful time.  And the sun was shining.  It wasn't yesterday, it was raining and gloomy. 


Here is a picture of our gorgeous tree just outside our window.


Happy Spring Everyone!

Lola

Mamita's Next Thing:
 Getting ready for Easter and making a basket for my son.  I'm off to do so now.   Not sure what else I'll get done. I'm cooking a leg of lamb for the first time so we'll see how that turns out.  I'll be sure to share.  And to all of you who are making Easter Dinner...... Good luck and Buon Appetito! (Italian for good appetite/Happy eating)


Sunday, March 25, 2012

Flower Barrettes {tutorial}


Hello Everyone,

As I said on my last post I was really inspired while making the charm party tote,  and I promised a tutorial.

And so here it is.......Flower Hair Barrettes


I've been wanting to make hair clips for my little daughter, who has massive amounts of hair (you'll see a picture of her wearing the clips down a little further) for a while now.  And making the tote gave me the idea to use the Pellon so the flowers would have some shape to them.  


Let's begin......

You will need:
scissors
manila paper for your pattern (I used an old folder)
       *you can use the flower pattern I provided at the end or you can make your own.
Pellon fusible fleece
favorite fabrics/scrap fabrics
sewing machine
complementary thread
pen/pencil
buttons
needle
spaghetti strap turner
nickel hair barrettes (that's what I used)
iron
a little girl with massive amounts of hair (optional)


1.  Draw out and cut out your floral pattern on manilla paper.  It makes it easier to trace the pattern on to your fabric.  You can cut a manilla folder 8.5" X 11" and print out the pattern at the end of the tutorial. 

2.  Collect all your Materials.

3.  Trace your patterns onto the back of your fabric and the Pellon.  Note you will need to trace and cut 2 flowers from your fabric and 1 flower from your Pellon.  The Pellon flower pieces will be slightly smaller than the fabric flower pieces.


4.  Cut your pieces out.


5.  Place the Pellon with the shiny side toward the back of the fabric on your flowers and using the iron press the Pellon onto the fabric.  Make sure you read the instructions on how to use the Pellon just to make sure you have your temperature correct.  

6.  Sandwich the flower with the wrong sides together and the Pellon in the middle and pin them together at the center so you will have minimal moving while you sew.  


7.  Carefully and slowly sew around the petals of the flower at 1/8 inch seam allowance.  You will need to lift your sewing foot to pivot your flower as you go around the petal.  I started sewing between the petals at the "V" area.  Go ahead and back stitch unless you want to tie off your thread at the end.  When you come around to the beginning, go ahead and back stitch again to hold your stitch.  Clip your thread.   


8.  When you are done sewing all your flowers you'll want to layer and position them.  See picture below.

9.  Sew the two layers together using your sewing machine make a few stitches and back stitch.  See picture below.  


This cool tool is a spaghetti strap turner.  It makes it easy to turn the fabric inside out.


10.  Measure the area of the barrette above the convex curve of the shank.  My measurement was 1/2".  Cut and sew a piece of fabric to fit that area.  I cut out a 1 1/4" X 1" (about).  I folded the 1 1/4" side in half, right sides together, and sewed on the non folded long side and one short side, leaving the other short sides open.  Turn your small strap inside out  and iron.

11.  Attach your strap to the back of your flower, making sure you fold the small top flower away from the area you will be sewing your strap on to.  Fold the open, not sewn closed, side under and sew that side and back stitch.  Feed the strap through the barrette in the area you measured.  Again, folding the top flower away from the sewing area, sew down your strap to lock the barrette in place, back stitch to hold your seem.  You will not have to fold this side under because you have a finished edge.  You can use a little dab of hot glue if you do not want your barrette to move around. 


 12.  Attach your decorative buttons to the center of your flower.  I found it easier to wait until the end due to having to fold the smaller top flower away from the sewing area when attaching your strap crating more bulk.
And.... TADA! You are finished.  
 Enjoy!


Here is my beautiful little 2 year old girl with the massive amounts of hair.  And not all of her hair is shown here.  When she was born, at the hospital all the nurses called her "the one with the hair".  

She insisted on wearing both barrettes.  
 Really..... she insisted.  


Here is the floral patterns.  
I only ask that you please only use it for personal use.
Thank you! Much appreciated. 

Mamita's Next Thing:

I'm still trying to get over this cold.  I've had great fun working on these barrettes.  I want to make more of them in different colors, sense I have tons of scrap fabric lying around.  I'm very into making bags right now, but I do have an Easter project That I hope to share very soon.

Hope you all had a great Weekend!

Lola

Thursday, March 22, 2012

Charm Party Tote


Hi Every One,

It's been about a week sense I've been able to post anything, maybe longer. 

Like I mentioned on my last post, my little daughter was sick and only wanted mommy, and with that, mommy became sick as well.  But not too sick to work on something.

Last week I started this Charm Party Tote pattern designed by Penny Sturges of Quiltsillustrated.com.  I got the pattern as a gift from my Sweet Mother-in-law when I was venturing on my idea of making totes for friends.  Well needless to say those didn't get made, but I did finish this tote yesterday (for me, that was on Wednesday).  I was so excited, my first tote ever.  I think it turned out pretty good. 
If I do say so myself.(smiley face)

If you'd like to see more of Penny's designs click here


It was nice and relaxing for me to make this tote.  The instructions were easy to follow.  You use a charm pack to make it.  I didn't have a charm packet so I cut my own squares, which was meditation time for me, never forgetting the measure twice cut once rule.  It was my first time working with fusible Pellon fleece, and let me tell you..... I love it.     

I can't wait to make my next tote or bag or.......the possibilities. 

If you are thinking of making something new and different for you, I say go for it!  You'll have that much more experience making it.

Have a great Weekend!

Lola

Mamita's Next Thing:
I was very inspired by making this tote, and I will show you what I made on my next post.  It will be a tutorial......... (Monday) 


Thursday, March 15, 2012

Cake Inspiration

 I hope you become inspired to give cake decorating a try. 


How did I get into cake decorating?  
Well,  I wanted to make birthday cakes for my children (at the time I just had my son) and I needed a challenge.  I had stopped working and was a full time mom. 


In June of 2007 I started to think "How cool would it be if I could make my son's 1st birthday cake".  Unfortunately I didn't make his first birthday cake, my timing was too late, his birthday is July 1.  I didn't even think of making him a simple cake.  I wanted something big for his first cake (that's me always thinking big, sometimes part of my down fall).  I thought that I had to take special classes to do so (you really don't, really).  Lucky for me his aunt had taken culinary classes and was in town.

Classes are really not needed.

He got his special cake, full of wonderful memories.  I can still see his aunt piping all those stars on the cake in the shape of a tractor.  If I knew, at that time, what it took to pipe all those stars, I would have done something different.  HA HA HA!!!

Go simple. 

Anyway, after that, I still went ahead with my plan of learning to cake decorate.  I thought "Maybe I wasn't able to make his first cake but I can make them from now on, and not to mention I'll have more experience".   So I signed up to take those Wilton Classes.  I was hooked form the very beginning.  I started to realize it was a new medium for me to express my self with.  I took all four classes that was offered at the time, and took three sugar flower making classes.

Now a days with the internet you can find how to make just about anything. 


Here are some of the cakes I made for the classes.  
The rainbow cake would be great for St. Patrick's day. just add a pot of gold at the end of the rainbow.


After taking classes I had to keep my skills up and started to crate my own designs.  Here are a few pictures of cakes I made beyond cake classes.  I started making cakes for family and friends birthdays.  I would sign up to make desserts for other events,  anything, just to get the practice.

 If you add bunnies and Easter eggs, the carrot cake would be cute for Easter.   

I started to go further into exploring the cake decorating world.  I went the next step and used cake as a sculpture medium and created 3D objects.  

Lighting McQueen was my first sculpted cake.  I almost pulled my hair out, but it didn't stop me from continuing my exploration. 


I did get to make my son's 2nd year birthday cake.  The brown and yellow Curious George cake ( a three tier cake) below, was for him.  The blue cake in the middle was for my daughter's 2nd birthday.

When asked, I'll make wedding cakes, the swan cake below is one of those.  The red cake with the chocolate leaves was for a live auction fund raiser, it sold for $175.  The beehive cake was for a teacher appreciation luncheon.

I don't know if I want to pursue cake making as a career, but I sure do have fun making them. 


I hope you give cake decorating a try.  You can be as crazy as you want, or as simple as you want.  If it doesn't turn out you can eat it and try again.

I bet your thinking how much did she gain making these cakes.  Well, let me tell you,  at the beginning I probably did gain a few pounds.  My husband gained 10 lb.  But we eventually got tired of eating so much cake.  Oh, and my husband was getting his doctorate degree so he was able to take cake to the college students.  Also, I become comfortable with just throwing the cake away (crazy, I know), because there was a period of two years where I also became an instructor in cake decorating I had to put it in the waset .
  
In the future I will be posting some cake making tutorials, but for now you can go to my Strawberry cupcake post, and find a tutorial on piping with chocolate.  You can use any stencil you want, you can even make your own on the computer. 


Mamita's Next Thing:

It's been a week,  with my 5 year old on spring break and my 2 year old being sick, it's a wonder I was able to get this post done.  Although I've had lots of fun figuring out Photoshop and laying out pictures differently.  I'm still working on those ideas floating in my head.  Being a newbie at posting, I don't have much to show you yet.  Please stay tuned though, I'll have things coming.  It'll be a surprise.  Also, with my 2 year old being sick there's a possibility I will be too.  Keeping my fingers crossed that I don't.    

Any body got some vitamin C!!!

Have a great weekend!

Lola


Sunday, March 11, 2012

Part 3 Cloth Napkins


Here's Part #3 of Napkin Making. 

What you will need:
cutting board  with measurements
long quilt ruler
rotary cutter
sewing machine
thread
scissors
fabric

1.  Decide what size you want your napkin to be when it's finished.   Because we are going to fold in the edges we need to create room for a seam allowance.   OK, so for the last two napkin tutorials, I used the measurement of 15" X 17", and because I want my finished seam to be 1/4" I need to add 1" to each measurement (I'll be folding and ironing twice, 1/4"once + 1/4" twice = 1/2" on both sides = 1").  So I am going to cut my fabric at 16" X 18".    If you want your seam to be larger, lets say you want the seam to be 1/2", instead of 1/4", from the finished edge you want to add 2"(folding and ironing 1/2" once + 1/2" twice = 1" on both sides = 2")  to the finished napkin measurements. 

OK enough math, Stay with me....

Choose your measurement and add 1" inch to each number


2.  Prepare to hem your napkin by folding and ironing 1/4" first time toward the wrong side of the fabric.  Then fold and iron 1/4" one more time.  See picture in step 3. 

Fold and iron 1/4"


By the way that handy ruler I'm using to measure my seam allowance is a hemming ruler.  They work great for hemming pants or anything else you'd like to hem.  It works by moving the little blue handle (witch I circled and pointed with an arrow in the above picture) and the blue triangles mark the measurement you want.  Then you make a mark at the top of your ruler on your fabric.  Or when you want to iron a perfect measurement. 


3.  Do the same as in step 2 to the opposite side.  If you prepare two opposite sides first the back of your napkin will look more uniform and neat.   


4.  Repeat step 2 on the other two sides.   


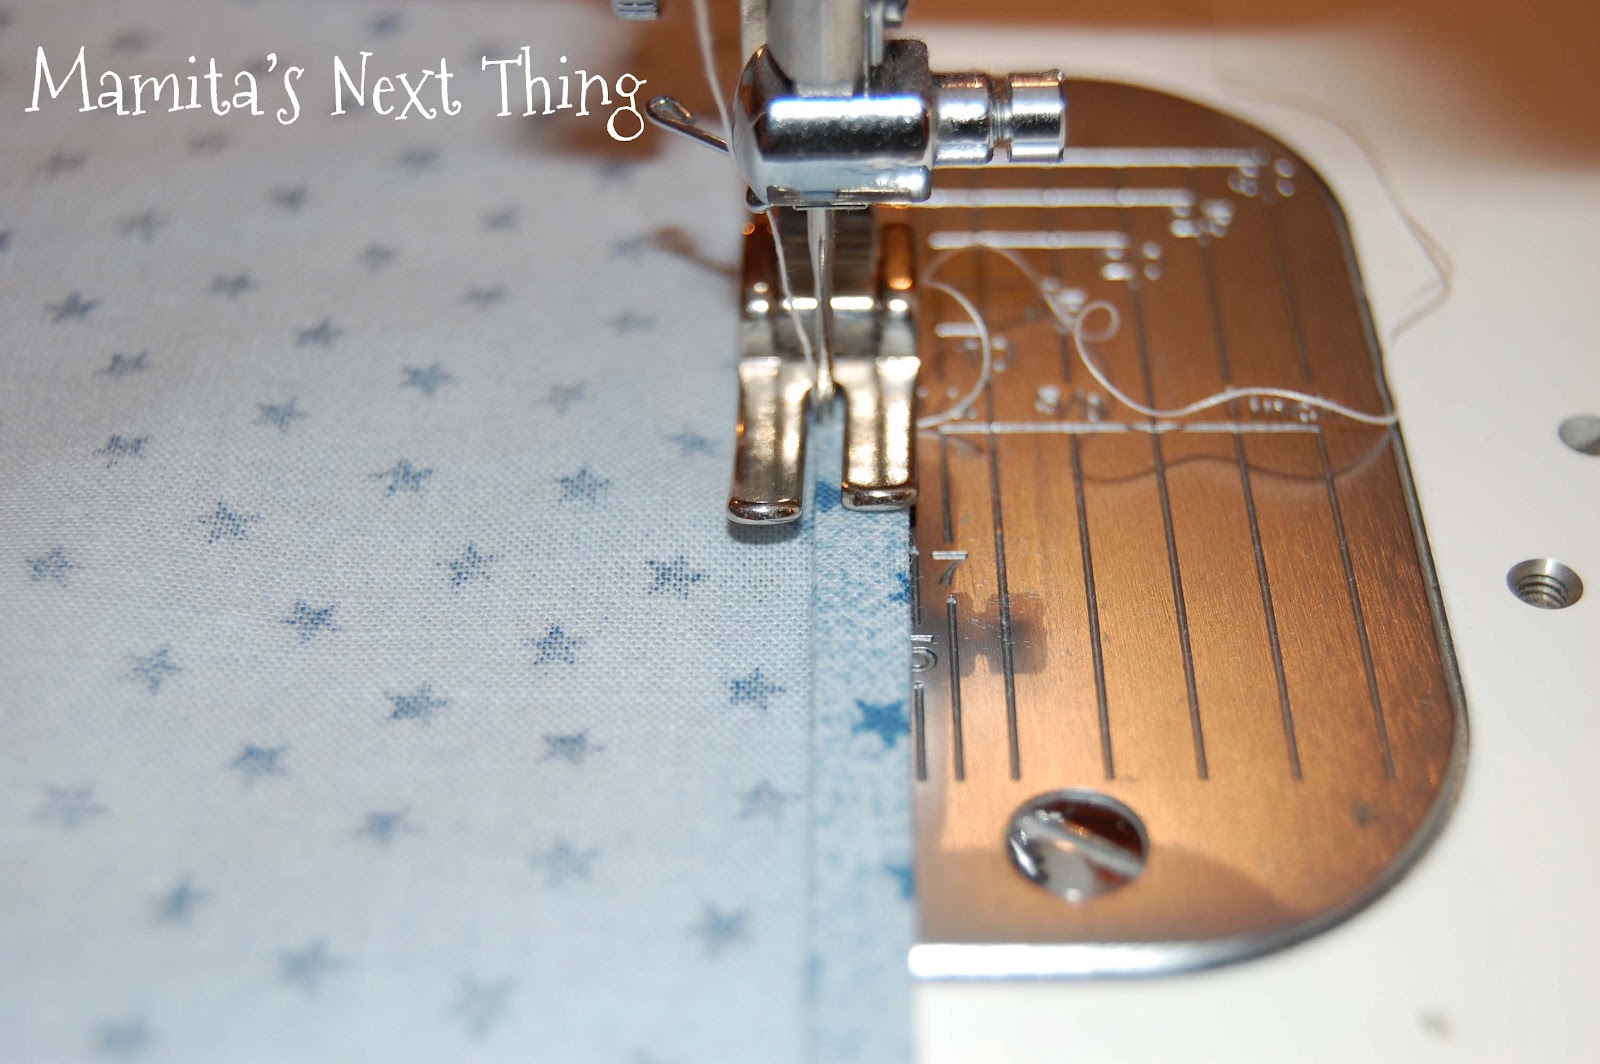
5.  When sewing the sides,  you want to sew on the wrong side of the fabric as close to the fold as possible.  You can use the inside of the presser foot for your guide.  See picture below.  Like the napkin in part 2, you want to sew continuously around the napkin pivoting at the corners (make sure you tuck in the edges of the folded corners, when folding fabric like this sometimes those corners tend to pop out).  Don't forget to back stitch when you start stitching. 

*tip- when you start sewing don't start on the corner, start in the middle of one of the sides.  It will be easier to start sewing. 

Use the inside of the presser foot for your guide


6.  When you are done, back stitch, clip your thread, iron, fold and go on to your next napkin. 
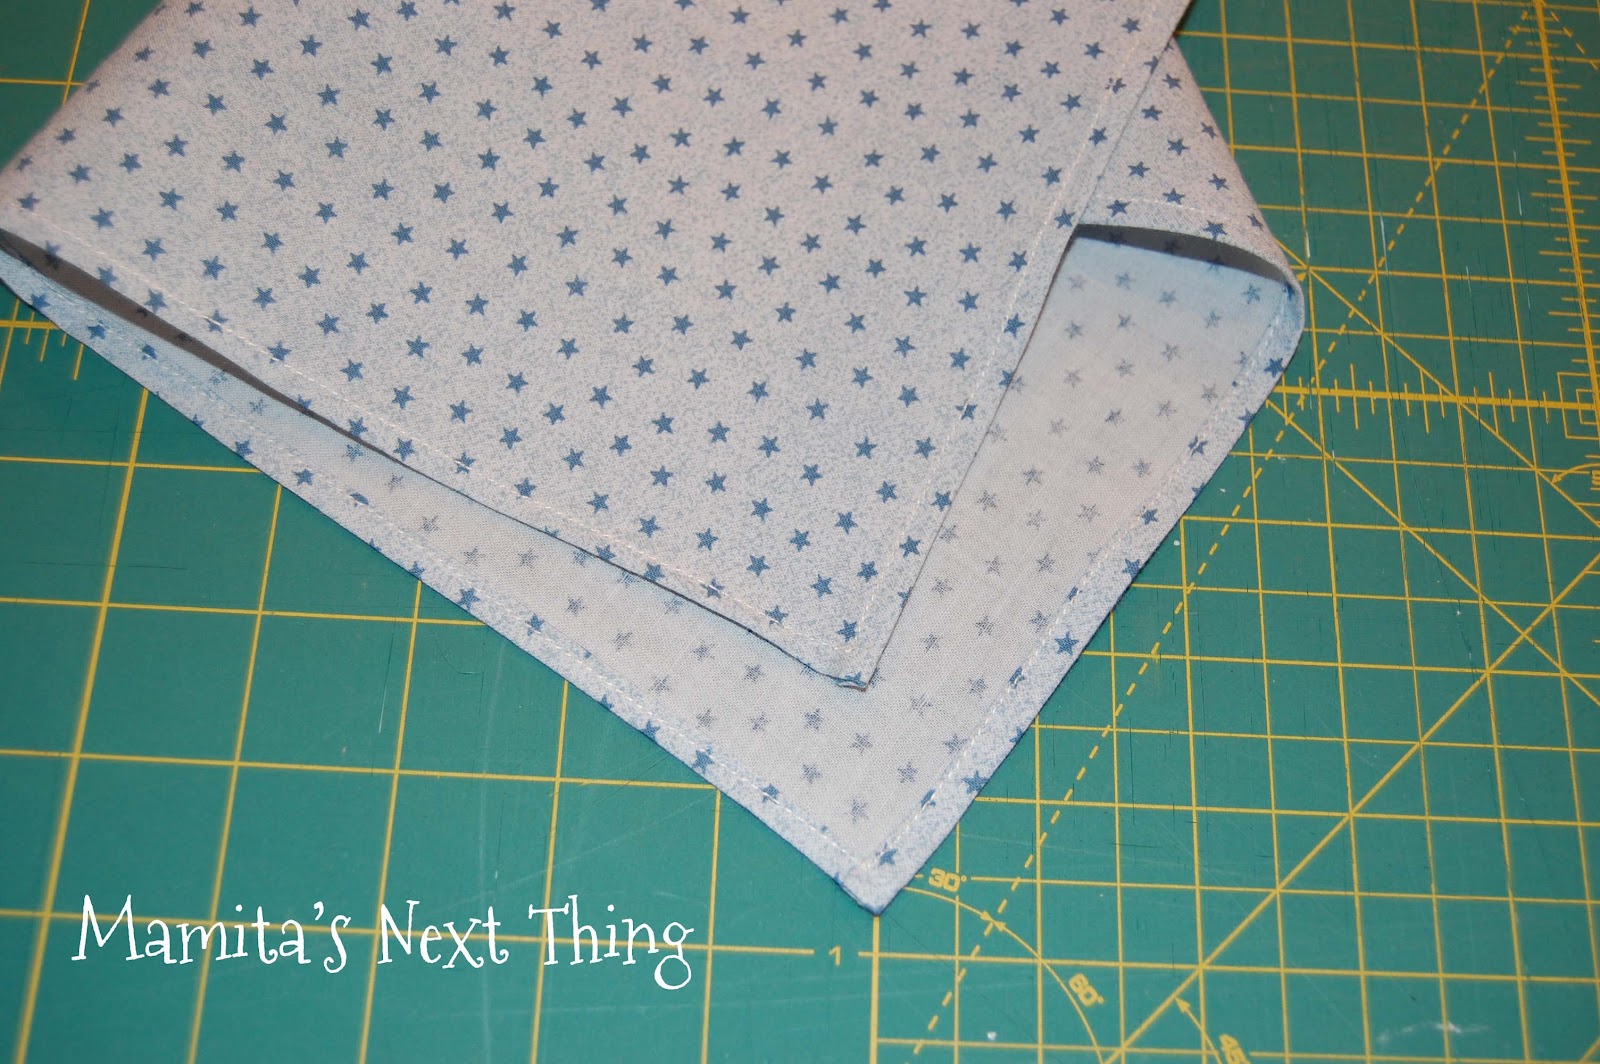
Finished napkin


To make things easier if you are making multiple napkins you can first cut all your napkins out. Second, iron in preparation to hem your napkins.  Third,  hem (sew) all your napkins. And finally Iron and fold your napkins. 


I hope I have inspired you to make some cloth napkins.  By the way, the kind of fabric I used was 100% woven cotton fabric.  The kind of fabric typically used for quilting. 

If you have any questions let me know.  
Happy Sewing!
Good Night, Sweet Dreams!
Lola
 
Mamita's Next Thing:
So many projects I want to do, but so little time.  I keep thinking of Mothers Day and how it would be wonderful to make kitchen kits that include napkins, place mats and oven mittens.  So I will be working on that, but I will be sharing a little bit more about me in the next coming weeks.  Like cakes I've done, in hope to inspire you to decorate one for a future special date.  
Come back to see the next thing.


Friday, March 9, 2012

Part 2 Cloth Napkins

#2 Cloth Napkins


What you need:
cutting board  with measurements
long quilt ruler
rotary cutter
sewing machine
thread
scissors
fabric


1. Cut your fabric to desired size.  I cut mine 15" X 17".  Or you can use the first way of cutting your fabric by ripping.  Refer to my first post on cloth napkin making.   


2.  Once you have your fabric cut you are going to sew around the fabric at 1/4 inch.  To start sewing place your sewing needle 1/4 inch from each end.  See picture below.

3.  Sew forward 3 stitches then back stitch 3 stitches.  This is usually just called back stitching and it's done to stabilize the stitch.    
Start at 1/4 inch from each end
 4.  Sew around the fabric continually, pivoting 1/4 inch before reaching the end at each corner.
Pivot fabric 1/4 inch before the end.


 5. When you come around to the beginning back stitch to hold your stitch and clip your threads.   At this point you can iron the napkin, fold it and go on to your next napkin, which is what I did.  Or you can fray your ends. 


Fraying your ends

I had touched a little on fraying in my first post on napkin making.  Fabric naturally frays and this happens when your fabric isn't finished with a seam of some sort, which I will go through on Part 3 of Napkin making.  When you let your fabric fray naturally you'll get long threads coming out of your fabric.  You can do two things, 1) clip the threads with some scissors or your rotary cutter. 2) gently pull the threads until they break off.  I usually cut them off.  
Natural fraying on fabric
If you want to create they fraying your self, all you have to do is gently pull the threads.  Go as far as a couple of threads just above your seam.  The seam gives the fabric strength.    


And this is what your napkin will look like. 

My little stack of napkins.  I want to have a bigger stack so I can have enough for the week. 


I hope I have inspired you to turn to cloth napkins.  
Have a great night!

Lola

Mamita's Next Thing:

Part 3 of napkin making.  These next napkins I will be showing will be a little more advanced.  I hope you will give it a try.  They can be good for gifts.  And thinking about it, you can give the first two as gifts also.  I'm thinking mothers day gift.