Hello Everyone,
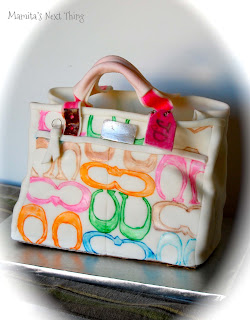
As I said on my last post I was really inspired while making the charm party tote, and I promised a tutorial.
And so here it is.......Flower Hair Barrettes
I've been wanting to make hair clips for my little daughter, who has massive amounts of hair (you'll see a picture of her wearing the clips down a little further) for a while now. And making the tote gave me the idea to use the Pellon so the flowers would have some shape to them.
Let's begin......
You will need:
scissors
manila paper for your pattern (I used an old folder)
*you can use the flower pattern I provided at the end or you can make your own.
Pellon fusible fleece
favorite fabrics/scrap fabrics
sewing machine
complementary thread
pen/pencil
buttons
needle
spaghetti strap turner
nickel hair barrettes (that's what I used)
iron
a little girl with massive amounts of hair (optional)
1. Draw out and cut out your floral pattern on manilla paper. It makes it easier to trace the pattern on to your fabric. You can cut a manilla folder 8.5" X 11" and print out the pattern at the end of the tutorial.
2. Collect all your Materials.
3. Trace your patterns onto the back of your fabric and the Pellon. Note you will need to trace and cut 2 flowers from your fabric and 1 flower from your Pellon. The Pellon flower pieces will be slightly smaller than the fabric flower pieces.
4. Cut your pieces out.
5. Place the Pellon with the shiny side toward the back of the fabric on your flowers and using the iron press the Pellon onto the fabric. Make sure you read the instructions on how to use the Pellon just to make sure you have your temperature correct.
6. Sandwich the flower with the wrong sides together and the Pellon in the middle and pin them together at the center so you will have minimal moving while you sew.
7. Carefully and slowly sew around the petals of the flower at 1/8 inch seam allowance. You will need to lift your sewing foot to pivot your flower as you go around the petal. I started sewing between the petals at the "V" area. Go ahead and back stitch unless you want to tie off your thread at the end. When you come around to the beginning, go ahead and back stitch again to hold your stitch. Clip your thread.
8. When you are done sewing all your flowers you'll want to layer and position them. See picture below.
9. Sew the two layers together using your sewing machine make a few stitches and back stitch. See picture below.
This cool tool is a spaghetti strap turner. It makes it easy to turn the fabric inside out.
10. Measure the area of the barrette above the convex curve of the shank. My measurement was 1/2". Cut and sew a piece of fabric to fit that area. I cut out a 1 1/4" X 1" (about). I folded the 1 1/4" side in half, right sides together, and sewed on the non folded long side and one short side, leaving the other short sides open. Turn your small strap inside out and iron.
And.... TADA! You are finished.
Enjoy!
She insisted on wearing both barrettes.
Really..... she insisted.
Here is the floral patterns.
I only ask that you please only use it for personal use.
Thank you! Much appreciated.
Mamita's Next Thing:
I'm still trying to get over this cold. I've had great fun working on these barrettes. I want to make more of them in different colors, sense I have tons of scrap fabric lying around. I'm very into making bags right now, but I do have an Easter project That I hope to share very soon.
Hope you all had a great Weekend!
Lola


